StyleGAN을 위한 이미지 전처리
dlib를 사용하여 눈 위치를 기준으로 소스 이미지와 대상 이미지를 중앙에 배치하고 자른다. 이 작업을 수행하기 위해 두 개의 함수를 만든다. 첫 번째는 dlib를 호출하여 인물의 눈 위치를 찾는다. 두 번째 함수는 눈 위치를 사용해 이미지의 중심을 눈 주위로 맞춘다. 정확히 중앙에 맞추지 않고 원래 StyleGAN 훈련 세트와 비슷하게 중앙에서 약간 오프셋을 둔다. 이 오프셋은 생성된 StyleGAN 얼굴의 눈을 감지하여 결정다. 눈 사이의 거리를 통해 얼굴이 얼마나 큰지 알 수 있으며, 이를 통해 이미지의 크기를 일관되게 조정할 수 있다.
def find_eyes(img):
    gray = cv2.cvtColor(img, cv2.COLOR_BGR2GRAY)
    rects = detector(gray, 0)
    if len(rects) == 0:
        raise ValueError("No faces detected")
    elif len(rects) > 1:
        raise ValueError("Multiple faces detected")

    shape = predictor(gray, rects[0])
    features = []
    for i in range(0, 5):
        features.append((i, (shape.part(i).x, shape.part(i).y)))

    return (int(features[3][1][0] + features[2][1][0]) // 2, int(features[3][1][1] + features[2][1][1]) // 2), \
           (int(features[1][1][0] + features[0][1][0]) // 2, int(features[1][1][1] + features[0][1][1]) // 2)

def crop_stylegan(img):
    left_eye, right_eye = find_eyes(img)
    d = abs(right_eye[0] - left_eye[0])
    z = 255 / d
    ar = img.shape[0] / img.shape[1]
    w = img.shape[1] * z
    img2 = cv2.resize(img, (int(w), int(w * ar)))
    border_size = 1024
    img3 = cv2.copyMakeBorder(
        img2,
        top=border_size,
        bottom=border_size,
        left=border_size,
        right=border_size,
        borderType=cv2.BORDER_REPLICATE)

    left_eye2, right_eye2 = find_eyes(img3)
    crop1 = left_eye2[0] - 385
    crop0 = left_eye2[1] - 490

    return img3[crop0:crop0+1024, crop1:crop1+1024]
다음 코드는 이미지를 사전 처리하고 자른다. 얼굴이 여러 개 발견되었다는 오류가 표시되면 이미지를 더 잘 자르거나 배경을 가려야 한. 프로그램에서 얼굴이 보이지 않으면 더 선명하고 고해상도 이미지를 얻는 것이 좋다.
image_source = cv2.imread(SOURCE_NAME)
if image_source is None:
    raise ValueErrorError("Source image not found")

image_target = cv2.imread(TARGET_NAME)

if image_target is None:
    raise ValueErrorError("Source image not found")

cropped_source = crop_stylegan(image_source)
cropped_target = crop_stylegan(image_target)

img = cv2.cvtColor(cropped_source, cv2.COLOR_BGR2RGB)
plt.imshow(img)
plt.title('source')
plt.show()

img = cv2.cvtColor(cropped_target, cv2.COLOR_BGR2RGB)
plt.imshow(img)
plt.title('target')
plt.show()

cv2.imwrite("cropped_source.png", cropped_source)
cv2.imwrite("cropped_target.png", cropped_target)
# print(find_eyes(cropped_source))
# print(find_eyes(cropped_target))

이제, 두 이미지는 1024x1024이며 NVIDIA가 StyleGAN을 훈련하는 데 사용한 ffhq 데이터 세트와 유사하게 크롭된다.
Convert Source to a GAN
StyleGAN2에는 이미지를 잠재 벡터로 변환하는 projector.py 유틸리티가 포함되어 있기 때문에 최신 StyleGAN3가 아닌 StyleGAN2를 사용한다. StyleGAN3는 이 투영을 제대로 지원하지 못다. 먼저, 소스를 GAN 잠재 벡터로 변환한다. 이 과정은 몇 분 정도 걸린다.
cmd = f"python /content/stylegan2-ada-pytorch/projector.py --save-video 0 --num-steps 1000 --outdir=out_source --target=cropped_source.png --network={NETWORK}"
!{cmd}
Convert Target to a GAN
다음으로 타겟을 GAN 잠재 벡터로 변환한다. 이 과정도 몇 분 정도 걸린다.
cmd = f"python /content/stylegan2-ada-pytorch/projector.py --save-video 0 --num-steps 1000 --outdir=out_target --target=cropped_target.png --network={NETWORK}"
!{cmd}
img_gan_source = cv2.imread('/content/out_source/proj.png')
img = cv2.cvtColor(img_gan_source, cv2.COLOR_BGR2RGB)
plt.imshow(img)
plt.title('source-gan')
plt.show()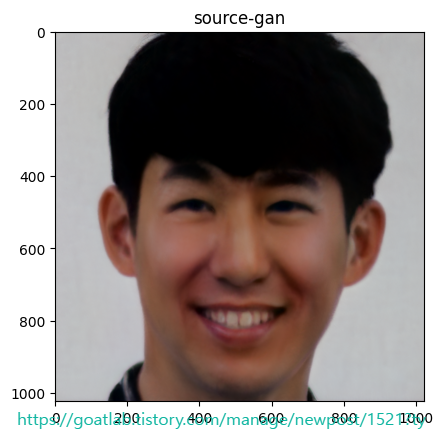
img_gan_target = cv2.imread('/content/out_target/proj.png')
img = cv2.cvtColor(img_gan_target, cv2.COLOR_BGR2RGB)
plt.imshow(img)
plt.title('target-gan')
plt.show()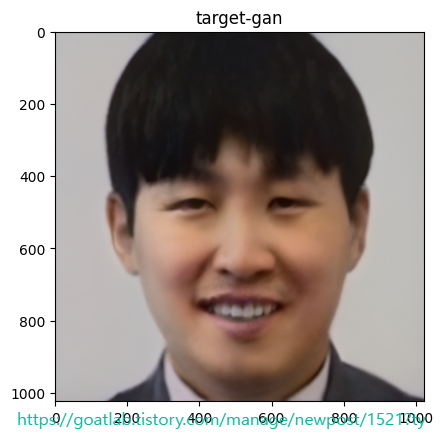
동영상 만들기
다음 코드는 이전에 얻은 두 개의 잠복 벡터 사이의 전환 동영상을 만든다.
import torch
import dnnlib
import legacy
import PIL.Image
import numpy as np
import imageio
from tqdm.notebook import tqdm

lvec1 = np.load('/content/out_source/projected_w.npz')['w']
lvec2 = np.load('/content/out_target/projected_w.npz')['w']
network_pkl = "https://nvlabs-fif-cdn.nvidia.com/stylegan2-ada-pytorch/pretrained/ffhq.pkl"
device = torch.device('cuda')

# Update the URL to use the correct domain name
network_pkl = "https://nvlabs-fi-cdn.nvidia.com/stylegan2-ada-pytorch/pretrained/ffhq.pkl"

with dnnlib.util.open_url(network_pkl) as fp:
    G = legacy.load_network_pkl(fp)['G_ema'].requires_grad_(False).to(device)

diff = lvec2 - lvec1
step = diff / STEPS
current = lvec1.copy()
target_uint8 = np.array([1024, 1024, 3], dtype=np.uint8)
video = imageio.get_writer('/content/movie.mp4', mode='I', fps=FPS, codec='libx264', bitrate='16M')

for j in tqdm(range(STEPS)):
    z = torch.from_numpy(current).to(device)
    synth_image = G.synthesis(z, noise_mode='const')
    synth_image = (synth_image + 1) * (255 / 2)
    synth_image = synth_image.permute(0, 2, 3, 1).clamp(0, 255).to(torch.uint8)[0].cpu().numpy()
    repeat = FREEZE_STEPS if j == 0 or j == (STEPS - 1) else 1

    for i in range(repeat):
        video.append_data(synth_image)

    current = current + step

video.close()
from google.colab import files
files.download("movie.mp4")
이 모든 단계를 완료했다면 동영상을 다운로드할 수 있다.
'DNN with Keras > Transfer Learning' 카테고리의 다른 글
| 스타일, 콘텐츠 및 변형 손실 계산하기 (0) | 2024.02.14 |
|---|---|
| Transfer Learning for Keras Style Transfer (0) | 2024.02.14 |
| Transfer Learning for Facial Points and GANs (0) | 2024.02.14 |
| 조기 중지의 이점 (0) | 2024.02.13 |
| Transfer Learning for NLP with Keras (0) | 2024.02.13 |


