미세 제어를 위해 tf.data 사용하기
tf.keras.preprocessing 유틸리티는 이미지의 디렉토리에서 tf.data.Dataset을 작성하는 편리한 방법이다. 보다 세밀한 제어를 위해 tf.data을 사용하여 자체 입력 파이프라인을 작성할 수 있다. 여기에서는 다운로드한 TGZ 파일의 파일 경로부터 시작하여 이를 수행하는 방법을 보여준다.
list_ds = tf.data.Dataset.list_files(str(data_dir/'*/*'), shuffle=False)
list_ds = list_ds.shuffle(image_count, reshuffle_each_iteration=False)
for f in list_ds.take(5):
  print(f.numpy())
b'/home/kbuilder/.keras/datasets/flower_photos/dandelion/8756906129_b05a1b26f2.jpg'
b'/home/kbuilder/.keras/datasets/flower_photos/daisy/1140299375_3aa7024466.jpg'
b'/home/kbuilder/.keras/datasets/flower_photos/dandelion/13386618495_3df1f1330d.jpg'
b'/home/kbuilder/.keras/datasets/flower_photos/sunflowers/26254755_1bfc494ef1_n.jpg'
b'/home/kbuilder/.keras/datasets/flower_photos/daisy/2611119198_9d46b94392.jpg'
파일의 트리 구조를 사용하여 class_names 목록을 컴파일할 수 있다.
class_names = np.array(sorted([item.name for item in data_dir.glob('*') if item.name != "LICENSE.txt"]))
print(class_names)
['daisy' 'dandelion' 'roses' 'sunflowers' 'tulips']
데이터세트를 훈련 및 검증으로 분할한다.
val_size = int(image_count * 0.2)
train_ds = list_ds.skip(val_size)
val_ds = list_ds.take(val_size)
다음과 같이 각 데이터세트의 길이를 볼 수 있다.
print(tf.data.experimental.cardinality(train_ds).numpy())
print(tf.data.experimental.cardinality(val_ds).numpy())
2936
734
파일 경로를 (img, label) 쌍으로 변환하는 간단한 함수를 작성한다.
def get_label(file_path):
  # convert the path to a list of path components
  parts = tf.strings.split(file_path, os.path.sep)
  # The second to last is the class-directory
  one_hot = parts[-2] == class_names
  # Integer encode the label
  return tf.argmax(one_hot)
def decode_img(img):
  # convert the compressed string to a 3D uint8 tensor
  img = tf.io.decode_jpeg(img, channels=3)
  # resize the image to the desired size
  return tf.image.resize(img, [img_height, img_width])
def process_path(file_path):
  label = get_label(file_path)
  # load the raw data from the file as a string
  img = tf.io.read_file(file_path)
  img = decode_img(img)
  return img, label
Dataset.map을 사용하여 image, label 쌍의 데이터세트를 작성한다.
# Set `num_parallel_calls` so multiple images are loaded/processed in parallel.
train_ds = train_ds.map(process_path, num_parallel_calls=AUTOTUNE)
val_ds = val_ds.map(process_path, num_parallel_calls=AUTOTUNE)
for image, label in train_ds.take(1):
  print("Image shape: ", image.numpy().shape)
  print("Label: ", label.numpy())
Image shape:  (180, 180, 3)
Label:  1
성능을 위한 데이터세트 구성하기
데이터세트로 모델을 훈련하려면 데이터에 대해 다음이 필요하다.
|
이러한 기능은 tf.data API를 사용하여 추가할 수 있다. 자세한 내용은 입력 파이프라인 성능 가이드를 참조하면 된다.
def configure_for_performance(ds):
  ds = ds.cache()
  ds = ds.shuffle(buffer_size=1000)
  ds = ds.batch(batch_size)
  ds = ds.prefetch(buffer_size=AUTOTUNE)
  return ds

train_ds = configure_for_performance(train_ds)
val_ds = configure_for_performance(val_ds)
데이터 시각화하기
이 데이터세트를 이전에 작성한 데이터세트와 유사하게 시각화할 수 있다.
image_batch, label_batch = next(iter(train_ds))

plt.figure(figsize=(10, 10))
for i in range(9):
  ax = plt.subplot(3, 3, i + 1)
  plt.imshow(image_batch[i].numpy().astype("uint8"))
  label = label_batch[i]
  plt.title(class_names[label])
  plt.axis("off")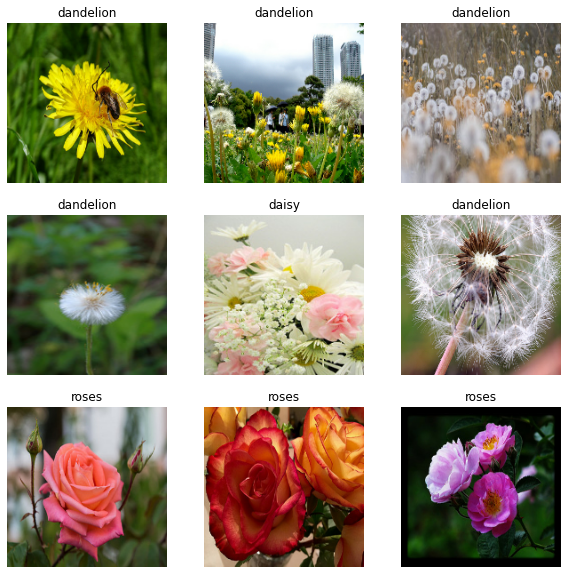
모델 계속 훈련하기
위의 keras.preprocessing에 의해 작성된 것과 유사한 tf.data.Dataset를 수동으로 빌드했다. 이것으로 모델 훈련을 계속할 수 있다. 이전과 마찬가지로 실행 시간을 짧게 유지하기 위해 몇 개의 epoch 동안만 훈련한다.
model.fit(
  train_ds,
  validation_data=val_ds,
  epochs=3
)
Epoch 1/3
92/92 [==============================] - 3s 21ms/step - loss: 0.7615 - accuracy: 0.7119 - val_loss: 0.7148 - val_accuracy: 0.7262
Epoch 2/3
92/92 [==============================] - 1s 12ms/step - loss: 0.5877 - accuracy: 0.7847 - val_loss: 0.7138 - val_accuracy: 0.7343
Epoch 3/3
92/92 [==============================] - 1s 12ms/step - loss: 0.4024 - accuracy: 0.8515 - val_loss: 0.8152 - val_accuracy: 0.7248
<keras.callbacks.History at 0x7f1414447a90>
TensorFlow 데이터세트 사용하기
지금까지 디스크에서 데이터를 로드하는 데 중점을 두었다. TensorFlow 데이터세트에서 다운로드하기 쉬운 대규모 데이터세트 카탈로그를 탐색하여 사용할 데이터세트를 찾을 수도 있다. 이전에 Flowers 데이터세트를 디스크에서 로드했으므로 TensorFlow 데이터세트로 가져오는 방법이 있다.
TensorFlow 데이터세트를 사용하여 꽃 데이터세트를 다운로드하다.
(train_ds, val_ds, test_ds), metadata = tfds.load(
    'tf_flowers',
    split=['train[:80%]', 'train[80%:90%]', 'train[90%:]'],
    with_info=True,
    as_supervised=True,
)
꽃 데이터세트에는 5개의 클래스가 있다.
num_classes = metadata.features['label'].num_classes
print(num_classes)
5
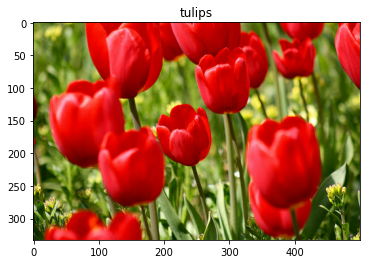
데이터세트에서 이미지를 검색한다.
get_label_name = metadata.features['label'].int2str

image, label = next(iter(train_ds))
_ = plt.imshow(image)
_ = plt.title(get_label_name(label))
2021-08-25 20:54:42.313064: W tensorflow/core/kernels/data/cache_dataset_ops.cc:768] The calling iterator did not fully read the dataset being cached. In order to avoid unexpected truncation of the dataset, the partially cached contents of the dataset will be discarded. This can happen if you have an input pipeline similar to `dataset.cache().take(k).repeat()`. You should use `dataset.take(k).cache().repeat()` instead.
이전과 마찬가지로, 성능을 위해 각 데이터세트를 일괄 처리, 셔플 및 구성해야 한다.
train_ds = configure_for_performance(train_ds)
val_ds = configure_for_performance(val_ds)
test_ds = configure_for_performance(test_ds)
데이터 강화 가이드를 방문하여 꽃 데이터세트 및 TensorFlow 데이터세트를 처리하는 전체 예제를 찾을 수 있다.
이미지 로드 및 전처리하기 | TensorFlow Core
Google I/O는 끝입니다! TensorFlow 세션 확인하기 세션 보기 이미지 로드 및 전처리하기 이 튜토리얼은 두 가지 방법으로 이미지 데이터세트를 로드하고 전처리하는 방법을 보여줍니다. 먼저, 고급 Ke
www.tensorflow.org
'DNN with Keras > TensorFlow' 카테고리의 다른 글
| [TensorFlow] CSV 전처리 (2) (0) | 2022.06.16 |
|---|---|
| [TensorFlow] CSV 전처리 (1) (0) | 2022.06.16 |
| [TensorFlow] 이미지 전처리 (1) (0) | 2022.06.15 |
| [TensorFlow] Keras Tuner (0) | 2022.06.15 |
| [TensorFlow] 모델 저장 / 복원 (2) (0) | 2022.06.15 |


